Views: 0 Author: Site Editor Publish Time: 2026-07-30 Origin: Site
Industrial piping systems often fail quietly before they break violently. A tiny, ignored vibration today can easily become a catastrophic blowout tomorrow. Improper pipe suspension and securing routinely leads to systemic failures across commercial facilities. These preventable failures include excessive vibration, joint fatigue, dangerous leaks, and strict code compliance violations. Utilizing the correct Pipe Clamp—installed strictly to engineered torque and spacing standards—serves as your baseline for facility safety and system longevity. This comprehensive guide details exactly how you should evaluate, select, and properly install various pipe support components. By following these evidence-based best practices, you will minimize implementation risks and actively prevent operational downtime.
Application Dictates Type: The choice between a saddle, channel, or riser clamp depends entirely on load direction, thermal movement, and existing structural frameworks.
Material Compatibility is Critical: Mixing dissimilar metals between the pipe and the clamp inevitably causes galvanic corrosion; isolation or exact material matching is mandatory.
Torque vs. Tolerances: Over-tightening restricts necessary thermal expansion, while under-tightening fails to arrest destructive system vibration.
Standardized Spacing: Installation must adhere strictly to industry spacing standards (e.g., MSS SP-58) based on pipe diameter and fluid weight.
You must evaluate your project requirements carefully before buying hardware. Solution categories directly align specific clamp types with their intended structural outcomes. We will review the main categories below to help you make informed engineering decisions.
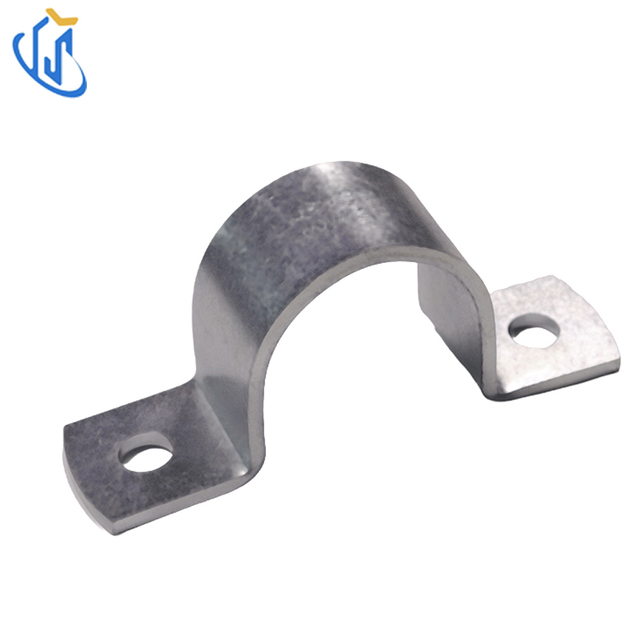
Securing pipes to flat surfaces requires extreme stability. A Saddle Pipe Clamp holds the pipeline firmly against a foundational structure. Use this style when your primary requirement is foundational resting support. You must check its maximum load-bearing capacity first. Evaluate whether the saddle provides a simple resting surface or requires secondary restraints. Some high-vibration areas require a full wrap-around strap instead of a basic half-saddle. We recommend using saddles for heavy horizontal pipelines like chilled water mains. They prevent downward sagging effectively. Installers frequently use them on commercial rooftops where pipes rest securely on sleepers. You avoid crushing the pipe insulation by spreading the weight evenly across the curved saddle base.
Many modern facilities use standard strut channel framing like Unistrut systems. A Channel Mount Clamp allows for highly scalable, multi-run pipe installations. You can easily integrate them into existing metal frameworks. When evaluating these components, assess their ease of lateral adjustability. You often need to move them slightly post-installation to align intersecting pipe segments. Also, verify their exact dimensional compatibility. They must match the specific strut depth and metal gauge used in your facility. Plumbers favor these for parallel water lines inside dense mechanical rooms. The split-piece design allows you to add or remove single pipes without disrupting the entire structural rack.
Vertical pipe runs introduce unique sheer weight challenges. A Riser Pipe Clamp supports these vertical columns effectively. It transfers the sheer weight of the pipe and its internal fluid directly to the building structure. You usually place them at floor penetrations in multi-story buildings. You must evaluate these clamps strictly on sheer load ratings. Friction-grip capabilities are also incredibly vital here. The steel ears of the clamp rest securely upon the concrete floor slab. Failure in a vertical run results in catastrophic vertical collapse. Never compromise on riser hardware. Always verify the steel thickness and bolt tensile strength before approving vertical support components.
Establishing authoritative, standard-compliant rules is crucial for your project. These rules separate professional installations from failure-prone DIY setups. We rely heavily on three core best practices to maintain facility integrity over decades of continuous operation.
Direct physical contact between dissimilar metals always causes problems. For instance, touching bare copper piping to a galvanized steel clamp induces rapid galvanic corrosion. This electro-chemical reaction degrades the pipeline quickly, causing pinhole leaks. You can fix this easily by specifying clamps featuring elastomeric linings. Rubber gaskets work perfectly for total electrical isolation. Epoxy coatings also provide a strong protective barrier against stray currents. Alternatively, mandate exact base metal matching across your blueprints. Use copper-plated clamps for copper lines and stainless clamps for stainless lines. Always separate reactive metals. Inspect insulation pads for tears before final assembly.
Arbitrary hardware spacing creates severe pipeline hazards. It leads directly to pipe sagging and hazardous fluid pooling inside the lines. Localized stress fractures will eventually develop at the sag points. You must follow established engineering standards like MSS SP-58. Your local municipal plumbing codes might also mandate specific distances. These standards dictate exact maximum span lengths. Calculations rely heavily on Pipe OD (Outside Diameter) and material schedule. Fluid contents (like gas versus heavy liquid) also change the required spacing drastically. Proper Pipe Clamps spacing ensures structural integrity over decades.
Standard Span Guidelines (Example Reference Only)
Pipe Material | Pipe OD Size | Max Span (Water Filled) | Max Span (Gas/Air) |
|---|---|---|---|
Standard Steel | 2 inches | 10 feet | 13 feet |
Standard Steel | 4 inches | 14 feet | 17 feet |
Copper Tube | 2 inches | 8 feet | 9 feet |
PVC / Plastic | 2 inches | 4 feet | 5 feet |
Installers often assume tighter is always better. This assumption proves incredibly dangerous in practice. Over-torquing strips threaded fasteners instantly. It crushes soft copper or plastic PVC piping beyond repair. It also completely eliminates the pipe's ability to undergo natural thermal expansion. You must mandate the use of calibrated torque wrenches on site. Crews should adhere strictly to the manufacturer’s specified Newton-meter (Nm) ratings. Under-tightening presents equal dangers. Loose hardware fails to arrest destructive system vibration. The hardware simply rattles off the support strut. Implement mandatory torque audits during your quality control walkthroughs.
Deploying hardware accurately requires a clear, evidence-based roadmap. Follow this standardized procedure to ensure total compliance and mechanical reliability.
You must verify the pipe Outside Diameter against the clamp's exact specification. Never confuse Nominal Pipe Size (NPS) with true OD. They are structurally different measurements. A 2-inch NPS pipe does not measure exactly 2 inches on the outside. Inspect your structural anchor points thoroughly beforehand. They must confidently handle the combined dynamic load of the pipe, fluid, and metal hardware. Weak concrete anchors guarantee system failure. Clean the outer surface of the pipe to remove dirt and grease. Debris prevents the rubber liners from gripping the metal effectively.
Place the bottom half of the strut base into its final position. Rest the pipe gently into the saddle or base. Ensure the pipeline remains perfectly level across multiple support points. Keep it free of aggressive binding or unnatural bending. Forced alignment creates immediate stress fractures in the joints. If the pipe does not sit flush naturally, adjust your strut framing. Do not force the pipe down by tightening the hardware aggressively. This creates hidden mechanical tension. That tension will eventually snap the nearest welded or threaded joint.
Follow these distinct steps to secure the assembly correctly without damaging the components.
Apply the top housing or secondary retaining strap over the pipe.
Hand-thread the securing nuts and bolts carefully. This manual step ensures proper thread engagement and actively prevents cross-threading.
Alternately tighten bolts in a diagonal cross-pattern for four-bolt models. For two-bolt versions, tighten them evenly side-by-side. This technique maintains equal pressure distribution across the metal casing.
Apply the final torque using a calibrated wrench per manufacturer specifications.
Verify that sliding guide clamps still allow lateral pipe movement. Ensure anchor clamps grip the pipe immovably.
Advanced commercial use-cases require careful operational foresight. Buyers must consider potential system pitfalls before finalizing any hardware purchase.
Thermal Expansion: Rigidly clamping long runs of pipe causes buckling. High temperature fluctuations force metal and plastic to expand naturally. You must differentiate between rigid fixed-point clamps and sliding guide clamps. Sliding guides allow safe longitudinal movement as the metal expands. If you lock down every single support point, the expanding pipe will literally tear the anchors out of the ceiling. Plan expansion loops and use guided supports strategically.
Vibration and Acoustic Dampening: Heavy pump activity creates intense system vibration. Standard bare-metal clamps transmit this mechanical noise easily through the building structure. The constant shaking will eventually vibrate nuts completely loose. You must introduce cushioned or acoustically rated hardware. Heavy neoprene linings absorb these destructive kinetic waves. This protects both the structural integrity and the acoustic comfort of the building occupants.
High-Pressure Blowout Risks: High-pressure fluid lines pose severe blowout risks. Simple friction-based clamping may prove completely inadequate here. You must discuss the necessity of welded shear lugs. You use these heavy steel lugs in conjunction with your riser hardware. The lugs are physically welded to the vertical pipe. They securely block the pipe from slipping downward through the clamp. This mechanical fail-safe is mandatory for high-rise chilled water and fire suppression risers.
Finding a reliable B2B supplier guarantees a qualified and safe project conversion. Look for specific indicators of manufacturing excellence when reviewing potential vendor catalogs.
Traceability and Certifications: Ensure your vendor provides comprehensive material test reports (MTRs). Clear load-rating documentation is absolutely mandatory for strict compliance audits. You cannot guess the safety margin of a critical support component. Reputable manufacturers publish independent lab testing results. Look for UL listings and FM approvals, especially for fire sprinkler system supports.
Availability of Specialized Coatings: Look for suppliers offering specialized protective layers for distinct environments. Uncoated steel rusts quickly in humid facilities. Hot-dipped galvanized options resist basic atmospheric rust beautifully. However, 316 stainless steel survives highly aggressive chemical and marine environments much better. Specialized polymer-coated options provide excellent dielectric protection for copper tubing.
Next Steps: Contact the manufacturer's engineering support team directly. Ask them for custom load calculations based on your specific system blueprint. You can also request a physical catalog sample. This verifies strut compatibility before placing massive bulk orders. Examining a sample allows you to check thread quality, metal thickness, and gasket adhesion firsthand.
Coating Application Comparison Chart
Coating / Material | Primary Benefit | Ideal Environment |
|---|---|---|
Electro-Galvanized | Basic rust prevention, cost-effective | Indoor, climate-controlled rooms |
Hot-Dipped Galvanized | Thick zinc layer, tough durability | Outdoor, exposed to rain |
316 Stainless Steel | Maximum corrosion resistance | Chemical plants, coastal areas |
Epoxy / Polymer Coated | Dielectric separation, chemical barrier | Dissimilar metal plumbing |
Effective pipe clamping remains a highly engineered process, not an afterthought. Selecting between saddle, channel, or riser configurations based on load is your first step. Respecting material compatibility prevents silent galvanic corrosion. Applying exact manufacturer torque guarantees system integrity without crushing the lines. These technical elements are non-negotiable for modern facility safety. We strongly encourage you to audit your current suspension specifications immediately. Reach out to a technical sales team to specify the correct hardware for your upcoming industrial project. Getting it right the first time prevents catastrophic failures and protects your infrastructure.
A: Generally yes, if you inspect it thoroughly first. You must check for metal fatigue, thread degradation, and rubber gasket integrity. However, in critical load-bearing vertical runs, replacing the hardware entirely is the safest compliance path. Metal stress is often invisible to the naked eye.
A: NPS is simply a standard naming designation. The actual Outside Diameter (OD) varies drastically depending on the pipe material (like copper versus steel) and its wall schedule. You must always specify hardware based on the exact OD to prevent loose fits or pipe crushing.
A: You prevent it by using dielectric insulation. Incorporate rubber or heavy neoprene inserts inside the metal housing. Alternatively, you can ensure the clamp metal perfectly matches the piping material, such as using copper supports for bare copper lines.